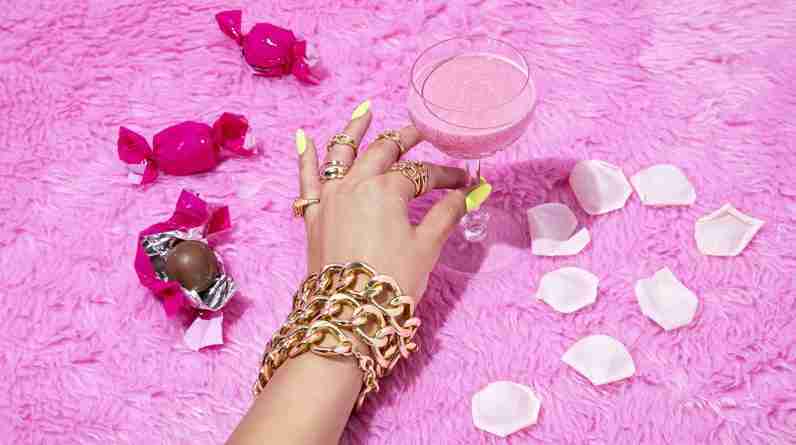
Are you tired of your regular nail polish chipping off after just a few days? Look no further! In “The Ultimate Guide to Gel Nail Designs,” we will take you through a comprehensive journey of everything you need to know about gel nails. From explaining what gel nails are and how they differ from regular polish, to various design ideas and step-by-step application techniques, this guide has got you covered. Get ready to say goodbye to smudged, dull nails and hello to long-lasting, vibrant gel nail art.

Choosing the Right Gel Nail Design
Understanding the Different Gel Nail Designs
When it comes to gel nail designs, there is a wide variety of options to choose from. Understanding the different types of gel nail designs can help you make an informed decision. Some popular options include solid color gel manicures, French tips, glitter and sparkle accents, ombre effect, and the use of nail stickers and decals. Each design offers a unique look and can be customized to suit your personal style and preferences.
Consider Your Personal Style and Preferences
Choosing the right gel nail design involves considering your personal style and preferences. Think about the colors, patterns, and shapes that you enjoy and that reflect your personality. Are you someone who gravitates towards bold and vibrant colors, or do you prefer more subtle and understated designs? Take your personal style into account when selecting a gel nail design to ensure you feel confident and comfortable with your choice.
Matching Gel Nail Designs with Occasions
Another factor to consider when choosing a gel nail design is the occasion or event you will be attending. Different designs can be more appropriate for certain occasions. For example, a classic French tip or solid color manicure may be perfect for a professional setting or a formal event. On the other hand, a design with glitter accents or intricate patterns may be more suitable for a night out or a special occasion. Consider the purpose and setting of the event when selecting a gel nail design.
Taking Inspiration from Nail Art Trends
Nail art trends are constantly evolving and can provide inspiration for your gel nail design. Follow nail artists and influencers on social media platforms to stay up to date with the latest trends and designs. You can also explore magazines, websites, and nail art blogs for inspiration. Don’t be afraid to get creative and try out new designs that catch your eye. Experimenting with different trends and techniques can be a fun and exciting way to express yourself through your nails.
Consulting with a Nail Technician
If you’re unsure about which gel nail design to choose, it’s always a good idea to consult with a professional nail technician. They have extensive knowledge and experience in the field and can provide guidance and recommendations based on your preferences and lifestyle. A nail technician can also advise you on the best techniques and products to achieve your desired gel nail design. Don’t hesitate to ask questions and seek their expertise to ensure you make the right choice.
Preparing Your Nails for Gel Application
Trimming and Shaping Your Nails
Before applying gel nail polish, it’s important to start with well-manicured nails. Begin by trimming your nails to your desired length using a nail clipper. Be sure to trim them evenly to achieve a neat and polished look. Once you’ve trimmed your nails, use a nail file to shape them. Choose a shape that suits your preferences, such as square, round, or almond. Shaping your nails properly not only enhances the overall appearance but also helps prevent breakage and snagging.
Cleaning and Removing Old Nail Polish
To ensure a clean and smooth surface for your gel nail application, you need to remove any old nail polish. Use a nail polish remover and cotton pads or a nail polish remover soak to effectively remove the old polish. Gently wipe each nail until all residue is gone. This step is crucial as any remnants of old nail polish can interfere with the adhesion of the gel polish and affect the longevity of your manicure.
Pushing Back and Trimming Cuticles
Before applying gel nail polish, it’s essential to push back and trim your cuticles. Use a cuticle pusher or an orangewood stick to gently push back the cuticles. Be careful not to push too hard or damage the surrounding skin. Once the cuticles are pushed back, use a cuticle trimmer to carefully trim any excess or overgrown cuticles. This step ensures a clean and polished look, and also allows the gel polish to adhere properly to the nail bed.
Buffing the Nail Surface
After cleaning and trimming the nails, it’s important to buff the nail surface. Use a buffer block or a nail buffer to gently smooth out any ridges or imperfections on the surface of the nails. Buffing the nails helps create a smooth and even canvas for the gel nail polish, allowing it to adhere better and provide a flawless finish. However, be cautious not to over-buff, as it can weaken the nails and make them more susceptible to damage.
Applying a Base Coat
Before applying the gel nail polish, it’s crucial to apply a base coat. The base coat acts as a foundation and creates a barrier between the natural nail and the gel polish. It helps prevent staining, strengthens the nails, and provides better adhesion for the gel polish. Apply a thin layer of base coat to each nail, making sure to cover the entire nail surface. Allow the base coat to dry completely before proceeding with the gel nail design application.
Choosing the Right Gel Nail Polish
Understanding the Different Types of Gel Nail Polish
When it comes to gel nail polish, there are different types to choose from. The main types include traditional gel polish, hybrid gel polish, and builder gel. Traditional gel polishes require a UV or LED lamp for curing, whereas hybrid gel polishes can be cured with both UV and LED lamps. Builder gel is a thicker gel that can be used to extend the nails or create a strong base layer. Understanding the differences between these types can help you choose the right gel nail polish for your desired design and needs.
Considering the Color and Finish
When selecting a gel nail polish, consider the color and finish that you prefer. Gel nail polishes are available in a wide range of colors, from classic neutrals to vibrant shades. Consider the season, occasion, and your personal style when choosing the color. Additionally, gel nail polishes come in various finishes, such as glossy, matte, metallic, and shimmer. Choose a finish that complements your gel nail design and adds an extra element of style to your manicure.
Evaluating the Quality and Brand
To ensure a long-lasting and high-quality gel nail design, it’s important to evaluate the quality of the gel nail polish and the reputation of the brand. Look for trusted and reputable brands that are known for their durability, pigmentation, and ease of application. Reading reviews and seeking recommendations from friends or nail technicians can help you make an informed decision. Investing in a high-quality gel nail polish can make a significant difference in the overall appearance and longevity of your manicure.
Checking for Compatibility with Your Lamp
Before purchasing a gel nail polish, it’s crucial to check if it is compatible with your UV or LED lamp. Different gel polishes require specific curing times and temperatures that may vary depending on the lamp used. Ensure that the gel nail polish you choose is designed to be cured under the type of lamp you own. This compatibility is essential for achieving the desired result and ensuring your gel nail design cures properly.
Reading Reviews and Recommendations
To gain further insights into the performance and quality of a gel nail polish, it’s helpful to read reviews and seek recommendations. Many online platforms, such as beauty blogs, forums, and e-commerce websites, provide reviews from customers who have tried various gel nail polishes. Reading these reviews can give you an idea of the pros and cons, pigmentation, longevity, and application process of different gel nail polishes. Additionally, don’t hesitate to ask for recommendations from friends, family, or nail technicians who have experience with different brands and products.
Creating Basic Gel Nail Designs
Trying Solid Color Gel Manicures
One of the simplest yet sophisticated gel nail designs is a solid color manicure. Solid color gel manicures are versatile and suitable for any occasion. Choose a color that complements your personal style, the occasion, or the season. Apply the gel nail polish in thin layers, curing each layer under the UV or LED lamp according to the manufacturer’s instructions. For a flawless finish, apply a top coat to seal the color and add shine. Solid color gel manicures are a great way to enhance your nails with a bold or subtle pop of color.
Experimenting with French Tips
French tips are a classic gel nail design that never goes out of style. This design features a natural or light-colored base with white tips, creating an elegant and clean look. To achieve French tips with gel nail polish, apply the light-colored gel polish as the base coat and cure it under the lamp. Once dry, use a nail tip guide or a steady hand to apply white gel polish to the tips of the nails. Cure the white gel polish and finish with a top coat for a glossy finish. French tips are ideal for professional settings, special occasions, or if you prefer a minimalistic and timeless nail design.
Adding Glitter and Sparkle
To add a touch of glamour and sparkle to your gel nail design, consider incorporating glitter accents. Glitter gel polishes are available in a variety of colors and sizes, allowing you to create different looks and effects. Apply the glitter gel polish to selected areas of the nail or create a gradient effect by focusing the glitter on the tips or base of the nail. Build up the glitter layer by layer, curing each layer under the lamp. Finish with a top coat to seal the glitter and give your nails a dazzling and eye-catching finish.
Playing with Ombre Effect
The ombre effect is a popular gel nail design that creates a seamless transition of colors from one nail to another. To achieve this effect, select two or more gel nail polish colors that complement each other. Apply the lighter color as the base coat and cure it under the lamp. Then, using either a sponge or a nail brush, dab or swipe the darker color onto the nail, starting from the top and gradually fading down. Repeat this process, adding more color and blending until you achieve the desired ombre effect. Finish with a top coat to unify the colors and create a polished look.
Using Nail Stickers and Decals
Nail stickers and decals are an easy and fun way to create intricate and detailed gel nail designs without the need for advanced artistic skills. Nail stickers are pre-designed adhesive decals that can be applied directly to the nail after the gel polish has cured. They come in various shapes, patterns, and themes, allowing you to customize your nail design effortlessly. Apply your chosen gel nail polish as the base coat, cure it, and then carefully place the nail sticker on the desired area of the nail. Finish with a top coat to secure the sticker and add shine. Nail stickers and decals are a great option for those looking to add a unique and eye-catching element to their gel nail designs.

Advanced Gel Nail Design Techniques
Learning to Do Gel Nail Extensions
If you’re looking to achieve longer and more dramatic nails, learning how to do gel nail extensions can be a game-changer. Gel nail extensions involve using gel-building products to extend the length of the natural nails, creating a stronger and more durable base for your gel nail design. This technique requires proper training and practice to ensure a professional and secure application. It’s recommended to seek guidance from a qualified nail technician or enroll in a gel nail extension course to learn the correct techniques and ensure the safety of your nails.
Mastering Gel Nail Art Brushes and Tools
To create intricate and detailed designs, it’s important to master gel nail art brushes and tools. Investing in a set of high-quality brushes specifically designed for gel nail art can significantly enhance your ability to create intricate patterns and designs. Thin nail art brushes can be used for precise lines and details, while dotting tools can create various dot sizes. Practice different brush strokes, techniques, and designs to develop your skills and explore your creativity. By mastering gel nail art brushes and tools, you can take your gel nail designs to the next level and achieve salon-worthy results.
Creating Intricate Patterns and Designs
Once you’ve mastered the basics of gel nail design, you can start experimenting with intricate patterns and designs. Use your gel nail art brushes and tools to create complex and detailed designs such as flowers, geometric patterns, or abstract art. You can also explore techniques like stamping, marbling, or hand-painting to achieve unique and personalized designs. Don’t be afraid to think outside the box and combine different elements, colors, and textures to create eye-catching and one-of-a-kind gel nail designs.
Exploring Marble or Watercolor Effects
Marble or watercolor effects are highly sought-after gel nail designs that create a beautiful and artistic look. To achieve these effects, apply a base coat in a light or neutral color and cure it under the lamp. Then, using a thin nail art brush or a toothpick, create “veins” on the nails by gently swirling a contrasting color gel polish onto the surface. Blend and mix the colors to achieve a marble or watercolor effect, curing the polish under the lamp after each application. Finish with a top coat to bring out the colors and add shine. Marble and watercolor effects can be customized by choosing different colors and experimenting with the swirling technique, allowing you to create a unique and mesmerizing gel nail design.
Incorporating 3D Embellishments
For those looking to add extra dimension and texture to their gel nail designs, incorporating 3D embellishments is a great option. 3D embellishments can include charms, rhinestones, beads, or handmade nail accessories. Apply a layer of gel polish to the nail, and while it’s still wet, carefully place the 3D embellishments onto the nail using tweezers or a dotting tool. Once you have achieved your desired arrangement, cure the gel polish under the lamp to secure the embellishments. Finish with a top coat to seal the design and add a glossy finish. 3D embellishments can elevate your gel nail design and make it truly unique and eye-catching.
Maintaining and Caring for Gel Nails
Protecting Gel Nails from Chipping and Peeling
Proper maintenance and care are essential for preserving the longevity of your gel nail design. To protect your gel nails from chipping and peeling, avoid activities that can put stress on the nails, such as using your nails as tools or excessive exposure to water. Additionally, be cautious when handling harsh chemicals, as they can weaken the gel polish and cause lifting. Consider using gloves when performing household chores or tasks that involve contact with potentially damaging substances. By being mindful of how you use and handle your hands, you can minimize the risk of chipping and peeling.
Moisturizing and Hydrating Hands and Cuticles
Moisturizing and hydrating your hands and cuticles is essential for maintaining healthy and beautiful gel nails. Regularly apply hand creams or lotions to keep your skin hydrated, as dry and dehydrated skin can lead to nail brittleness and breakage. Additionally, use cuticle oils or creams to moisturize and soften the cuticles. Gently massage the cuticle area to improve circulation and promote healthy nail growth. By keeping your hands and cuticles properly moisturized, you can ensure that your gel nails remain strong and resilient.
Avoiding Harsh Chemicals and Excessive Water Exposure
Gel nails are durable, but they can still be susceptible to damage from harsh chemicals and excessive water exposure. Avoid using products containing acetone or other strong solvents, as they can weaken and dissolve the gel polish. When performing tasks that involve prolonged water exposure, such as swimming or dishwashing, consider wearing gloves to protect your gel nails. Excessive water exposure can cause the gel polish to lift and result in chipping or peeling. By minimizing contact with harsh chemicals and limiting water exposure, you can prolong the lifespan of your gel nail design.
Applying Cuticle Oil and Nail Strengthener
To promote nail health and strength, consider incorporating cuticle oil and nail strengtheners into your nail care routine. Cuticle oils nourish and moisturize the cuticles, preventing dryness and promoting healthy nail growth. Apply cuticle oil daily or as needed, massaging it into the cuticle area for optimal absorption. Nail strengtheners, on the other hand, provide additional protection and fortification to the nails. Look for strengtheners containing ingredients like keratin, calcium, or vitamin E, which can help strengthen and protect the nails from damage. Regular use of cuticle oil and nail strengtheners can contribute to healthier and stronger gel nails.
Scheduling Regular Nail Maintenance
Maintaining the health and appearance of your gel nails requires regular nail maintenance. Schedule regular visits to your nail technician for professional upkeep, such as nail fills, nail repairs, or nail extensions. Regular maintenance allows your nail technician to assess the condition of your nails, address any issues, and ensure that your gel nail design remains intact and beautiful. Additionally, consider seeking a professional manicure at least once a month to give your nails a fresh start and maintain their overall health.

Removing Gel Nail Designs Safely
Gathering the Necessary Tools
Before removing your gel nail design, gather the necessary tools to ensure a safe and efficient removal process. You will need acetone, cotton pads, aluminum foil or nail wraps, a wooden stick or cuticle pusher, and a nail buffer. Make sure you have enough acetone to fully soak your nails, and prepare the cotton pads by cutting them into small squares. Having all the tools ready beforehand will save time and enable a smooth removal process.
Protecting the Surrounding Skin
To protect the surrounding skin from the drying effects of acetone, apply a thin layer of petroleum jelly or cuticle oil around the nail bed. This protective barrier acts as a shield, preventing the acetone from coming into direct contact with the skin, which can cause dryness and irritation. By taking this simple precaution, you can ensure that the removal process is gentle and minimizes any potential discomfort.
Soaking the Gel Nails in Acetone
To remove gel nails, soaking them in acetone is the most effective method. Start by saturating a cotton pad with acetone and placing it directly on top of the nail. Wrap the nail in aluminum foil or use nail wraps to secure the cotton pad in place and create a sealed environment. Repeat this process for each nail, ensuring that they are all fully saturated with acetone. Let the nails soak for approximately 10-15 minutes. During this time, the acetone will dissolve the gel polish, making it easier to remove.
Using a Wooden Stick to Gently Scrape Off the Gel
Once the gel polish has softened, gently scrape off the remaining gel using a wooden stick or cuticle pusher. Be careful not to use excessive force or press too hard, as this can damage the natural nail. Take your time and remove the gel polish layer by layer until only the natural nail remains. If there are any stubborn areas, soak the nail for a few more minutes and then gently scrape away the remaining gel. Avoid using metal tools, as they can be too harsh and can cause unnecessary damage to the nail surface.
Moisturizing and Nourishing Nails After Removal
After removing your gel nail design, it’s important to moisturize and nourish the nails to restore hydration and prevent dryness. Apply cuticle oil and massage it into the nail bed and cuticles to replenish moisture. You can also use a nail strengthener or a nail treatment to provide extra nourishment and help restore the nails’ strength. Taking the time to moisturize and nourish your nails after removal will promote healthy nail growth and prepare them for your next gel nail design.
Dealing with Common Gel Nail Issues
Addressing Gel Nail Lifting and Peeling
One common issue with gel nails is lifting or peeling of the gel polish from the natural nail. Gel nail lifting can occur due to improper application techniques, inadequate preparation, or exposure to water or harsh chemicals. To address gel nail lifting, push back the lifted area gently using a wooden stick or cuticle pusher. Avoid picking or forcibly removing the lifted gel, as this can cause further damage to the natural nail. Once the lifted area has been pushed back, apply a small amount of nail glue or gel resin to secure the lifted gel in place. Remember to properly clean and prepare the nail bed before proceeding with any repairs.
Troubleshooting Gel Nail Bubbles or Wrinkles
Gel nail bubbles or wrinkles can occur during the application process or as a result of improper curing. To troubleshoot gel nail bubbles or wrinkles, start by ensuring that you are applying the gel polish in thin, even layers. Thick application can trap air bubbles and create uneven surfaces. When curing the gel polish, be mindful of the recommended curing time and lamp strength. Over-curing or under-curing can lead to bubbles or wrinkles. If bubbles or wrinkles occur, gently file the affected area using a nail buffer to even out the surface. Alternatively, if the problem persists, it may be necessary to remove the gel nail design and start afresh.
Managing Gel Nail Discoloration or Staining
Gel nail discoloration or staining can occur due to various reasons, such as prolonged exposure to certain pigmented nail polish colors, smoking, or lifestyle factors. To manage gel nail discoloration or staining, start by ensuring that you always apply a base coat before applying colored gel polish. The base coat acts as a barrier and helps to prevent direct contact between the colored gel polish and the natural nail, reducing the risk of staining. Additionally, regularly cleanse your nails using a non-acetone nail polish remover to remove any surface stains. If the discoloration persists, consult with a nail technician who can recommend specific treatments or techniques to address the issue.
Preventing Fungal Infections and Nail Damage
To prevent fungal infections and nail damage, it’s important to practice good nail hygiene and take appropriate precautions. Avoid sharing nail tools or using uncleaned tools, as this can spread bacteria or fungi. Properly clean and disinfect your nail tools after each use. Additionally, be cautious when using public facilities such as swimming pools or communal showers, as they can harbor fungi that can lead to infections. If you notice any signs of a fungal infection, such as discoloration, thickening, or brittleness of the nails, seek professional help from a nail technician or healthcare provider for appropriate treatment.
Seeking Professional Help for Persistent Issues
If you’re experiencing persistent issues with your gel nails, such as chronic lifting, recurrent bubbling, or ongoing discoloration, it’s important to seek professional help. A qualified nail technician can assess the condition of your nails, identify any underlying causes of the issues, and provide appropriate recommendations and solutions. They may recommend specific treatments, adjustments in your nail care routine, or changes in the products or techniques you are using. By seeking professional help, you can address the issues effectively and prevent further damage to your nails.
DIY vs. Professional Gel Nail Designs
Pros and Cons of DIY Gel Nails
Doing gel nail designs at home has its pros and cons. Some advantages of DIY gel nails include convenience, cost-saving, and the ability to express your creativity whenever you want. DIY gel nails allow you to experiment with different designs and techniques in the comfort of your own home. However, there are also some drawbacks to consider. DIY gel nails require a certain level of skill and practice to achieve professional-looking results. Additionally, investing in the necessary tools and products can be expensive initially. Lack of professional knowledge and experience can also lead to issues such as lifting, peeling, or improper curing. Consider your skill level, willingness to invest time and money, and desired results when deciding whether to do gel nails yourself.
Benefits of Professional Gel Nail Applications
Getting gel nail designs done by a professional nail technician offers several benefits. Professional nail technicians have the expertise and training to ensure precise application, proper curing, and long-lasting results. They are knowledgeable about different gel nail techniques, products, and trends, and can provide personalized advice and recommendations. Professional gel nail applications often result in a flawless finish and can save you time and effort. Additionally, regular visits to a nail salon for professional maintenance and upkeep can help keep your nails in optimal health and minimize potential issues.
Factors to Consider in Making a Choice
When deciding between DIY gel nails and professional gel nail applications, there are several factors to consider. Evaluate your skill level and confidence in achieving salon-worthy results at home. Consider the time and effort you are willing to invest in learning and practicing gel nail techniques. Take into account your budget and whether you are willing to invest in the necessary tools and products for DIY gel nails. Additionally, think about the convenience and personalized advice that a professional nail technician can offer. By considering these factors, you can make an informed decision that aligns with your preferences and lifestyle.
Comparing Costs and Time Investments
Cost and time investments differ between DIY gel nails and professional gel nail applications. DIY gel nails can be more budget-friendly in the long run, as you only need to invest in the initial set of tools and products. However, it’s important to note that high-quality gel nail products can be more expensive upfront. DIY gel nails also require time for practicing techniques, experimenting with designs, and maintaining your nails. On the other hand, professional gel nail applications may have higher upfront costs, but they save you time and effort in terms of learning techniques and maintaining your nails. Consider your budget and time availability when comparing the costs and time investments of DIY and professional gel nails.
Evaluating Skill Level and Confidence
Before deciding whether to do gel nails yourself or seek professional help, evaluate your skill level and confidence in achieving the desired results. If you have experience with nail care and are confident in your ability to follow instructions and practice techniques, DIY gel nails can be a great option. However, if you’re new to gel nails or unsure of your skills, consulting with a professional nail technician can provide guidance and ensure that your gel nail design is executed flawlessly. Building your skill level and confidence takes time and practice, so take your experience and comfort level into account when making your choice.
Exploring Gel Nail Design Trends
Popular Gel Nail Shapes
Gel nail shapes can transform the overall look and feel of your manicure. Some popular gel nail shapes include square, round, oval, almond, coffin, and stiletto. Square nails offer a clean and sophisticated look, while round nails create a more natural appearance. Oval nails are feminine and graceful, while almond nails elongate the fingers. Coffin nails have a trendy and edgy vibe, while stiletto nails are bold and daring. Choose a gel nail shape that complements your personal style and preferences, and don’t be afraid to experiment with different shapes to find what suits you best.
Trending Gel Nail Colors
Gel nail colors are constantly evolving and changing with the seasons and trends. Some trending gel nail colors include neutral shades like nude and blush, pastel tones for a soft and delicate look, vibrant and bold colors for a statement-making manicure, and metallic shades for a glamorous and eye-catching effect. Experimenting with different gel nail colors allows you to stay up to date with the latest trends and express your personal style. Whether you’re looking for a classic and timeless look or want to try something fresh and unexpected, there is a gel nail color to suit every taste.
Innovative Nail Art Techniques
Innovative nail art techniques have revolutionized the world of gel nail designs. From ombre effects to marble or watercolor designs, there are endless possibilities to explore. Other cutting-edge techniques include foil application, shattered glass effect, negative space designs, and holographic finishes. These techniques add depth, texture, and creativity to gel nail designs, allowing you to create truly unique and show-stopping manicures. Stay informed about the latest nail art techniques to stay ahead of the trends and constantly push the boundaries of your gel nail designs.
Stylish Nail Decorations and Accessories
Nail decorations and accessories can elevate your gel nail designs and make them stand out. Some stylish options include rhinestones, studs, pearls, beads, and charms. These embellishments can be applied to the nails using nail glue or gel resin, creating intricate and eye-catching designs. Nail decorations and accessories allow you to personalize and customize your gel nail designs, adding a touch of glamour and individuality. Experiment with different combinations and placements to create unique and stylish nail art that reflects your personal style.
Celebrity and Influencer Inspirations
Celebrity and influencer inspirations are a great source of ideas and motivation when it comes to gel nail designs. Many celebrities and influencers are known for their stylish and creative nail designs, setting trends in the industry. Follow your favorite celebrities and influencers on social media platforms to stay updated on their latest gel nail designs. Take inspiration from their color choices, patterns, and overall aesthetics. While you may not be able to recreate the exact designs, you can use them as a starting point to create your own unique gel nail designs that are on-trend and reflective of your personal style.
In conclusion, the world of gel nail designs offers endless possibilities for creating beautiful and unique manicures. Understanding the different types of designs and considering your personal style and preferences will help you choose the right gel nail design. Properly preparing your nails and selecting the right gel nail polish are crucial steps for achieving a flawless and long-lasting manicure. Whether you’re creating basic gel nail designs or experimenting with advanced techniques, always prioritize the maintenance and care of your gel nails. By following best practices and understanding common issues, you can maintain healthy and beautiful gel nails. Lastly, deciding between DIY gel nails and professional applications requires evaluating factors such as cost, time investment, skill level, and confidence. Stay inspired by exploring gel nail design trends and taking cues from influential figures in the nail industry. With the right knowledge and creativity, you can enjoy stunning gel nail designs that reflect your personality and make a stylish statement.