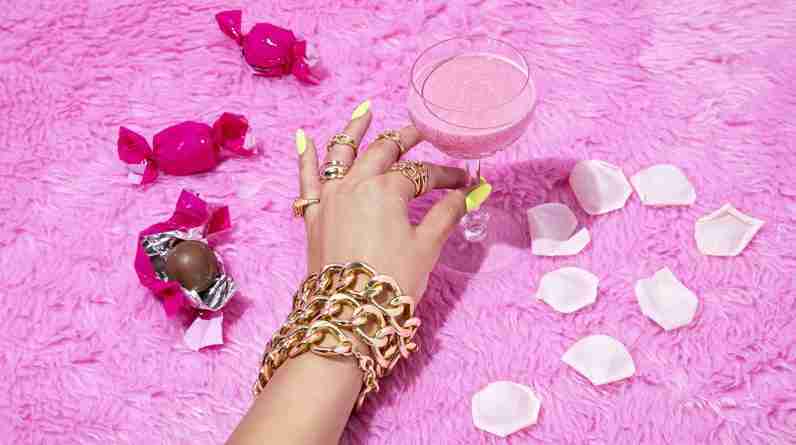
Ready to take your at-home manicures to the next level? Look no further than “The Ultimate Guide To DIY Nail Art.” This comprehensive guide is packed with tips, tricks, and step-by-step tutorials to help you achieve salon-worthy nails right in the comfort of your own home. With easy-to-follow instructions and a friendly tone, this guide is perfect for beginners and nail art enthusiasts alike. From simple designs to more intricate patterns, you’ll learn all the techniques and tools you need to create stunning nail art that will wow your friends and make your Instagram feed pop. So grab your nail polish collection and get ready to unleash your creativity – beautiful nails are just a stroke away!
Nail Art Basics
Gathering the necessary tools and materials
To create stunning nail art designs, it is essential to start by gathering the necessary tools and materials. You will need a variety of nail polish colors, including base coat and top coat, a nail art brush set, dotting tools, striping tape, stamping plates, a stamper, water marbling tools, and acrylic paints. Additionally, ensure you have cotton balls, nail polish remover, a nail file, and a buffer to prepare your nails for the art.
Preparing your nails
Before applying any nail art, it is crucial to prepare your nails properly. Start by removing any existing nail polish with a gentle nail polish remover, ensuring your nails are clean and free from any residue. Shape and file your nails to your desired length and shape, and use a buffer to smooth the surface of each nail. Push back your cuticles using a cuticle pusher or a wooden stick, then moisturize your hands and nails to keep them hydrated.
Applying a base coat
Applying a base coat is an essential step in any nail art design. It not only protects your nails from staining but also helps the nail polish adhere better to the nail surface. Start by applying a thin layer of base coat to each nail, ensuring you cover the entire surface. Let it dry completely before moving on to the next step.
Different Nail Art Techniques
Stamping
Stamping is a popular technique that allows you to create intricate designs on your nails easily. To get started, select a stamping plate with the desired design and apply a stamping polish to the design. Use a scraper to remove excess polish, then press the stamper onto the plate to pick up the design. Finally, transfer the design onto your nail by gently rolling the stamper over the nail’s surface. Seal it with a top coat for long-lasting results.
Water marbling
Water marbling is a mesmerizing technique that creates a unique marble-like effect on your nails. Begin by filling a small bowl with room temperature water and adding a few drops of different nail polish colors. Use a toothpick or a thin needle to create a design on the water’s surface, then dip your nail into the water, allowing the polish to adhere to your nail. Repeat the process for each nail, clean up any excess polish around your fingers, and finish with a top coat.
Gradient nails
Gradient nails create a beautiful transition of colors from one shade to another. Start by selecting two or more nail polish colors that blend well together. Apply a light base color to your nails and let it dry. Then, on a makeup sponge, apply a strip of the chosen colors, overlapping slightly. Dab the sponge onto your nail, repeatedly pressing until the desired gradient effect is achieved. Finish with a top coat to smooth out the design.
Dotting
Dotting allows you to create various patterns and designs using dots of different sizes. Begin by choosing a dotting tool with a small or large tip, depending on the size of the dots you want to create. Dip the dotting tool into the desired nail polish color and gently press it onto your nail, creating dots in any pattern you wish. Experiment with different colors and dotting sizes to create unique designs that suit your style.
Tape manicure
Tape manicure is a technique that uses strips of tape to create clean and precise lines on your nails. Start by applying a base coat and letting it dry. Cut thin strips of tape and place them on your nails in any design or pattern you desire. Apply a different color of nail polish over the exposed parts of your nails, then carefully remove the tape while the polish is still wet. Finish with a top coat for a flawless, professional look.
Freehand designs
Freehand designs allow you to showcase your creativity by painting intricate patterns, shapes, or images directly onto your nails. To begin, choose a fine-tipped brush or a nail art pen and dip it into the desired nail polish color. Start painting your design from the base of your nail, gradually building up the shape and details. Take your time, and if needed, use a cotton swab dipped in nail polish remover to clean up any mistakes. Once your design is complete, seal it with a top coat.
Creating Simple Nail Art Designs
Polka dots
Polka dots are a classic and easy nail art design that adds a playful touch to your nails. Start by applying a base coat and letting it dry. Choose a dotting tool or a toothpick and dip it into your desired nail polish color. Gently press the tool onto your nails, creating evenly spaced dots. Experiment with different colors and sizes of dots to create a fun and vibrant polka dot design. Seal it with a top coat to ensure long-lasting wear.
Stripes
Stripes are a versatile nail art design that can be simple or intricate, depending on your preference. Begin by applying a base coat, allowing it to dry. Cut thin strips of striping tape and place them on your nails in straight or diagonal lines. Apply a different color of nail polish over the exposed parts of your nails, then carefully remove the tape while the polish is still wet. Finish with a top coat for a clean and polished striped design.
French tips
French tips are a timeless and elegant nail art design that gives your nails a sophisticated look. Start by applying a base coat and allowing it to dry. Then, choose a natural or sheer pink nail polish for the tips of your nails. Using a steady hand, paint a curved line across the tip of each nail. If needed, use a brush dipped in nail polish remover to clean up any mistakes. Finish with a top coat for a flawless French tip design.
Ombre nails
Ombre nails create a beautiful gradient effect, transitioning from one color to another. Begin by applying a base coat and letting it dry. Select two or more nail polish colors that blend well together. On a makeup sponge, apply a strip of the chosen colors, overlapping slightly. Dab the sponge onto your nail, repeatedly pressing until the desired ombre effect is achieved. Finish with a top coat to blend the colors seamlessly.
Floral designs
Floral designs add a touch of femininity and beauty to your nail art. Begin by applying a base coat and letting it dry. Choose a fine-tipped brush or a nail art pen and dip it into your desired nail polish colors. Start painting delicate flowers, petals, or leaves on your nails, building each design layer by layer. Allow the polish to dry between each layer. Finish with a top coat to protect the design and add shine.
Animal prints
Animal prints are a fun and trendy nail art design that allows you to unleash your wild side. Start by applying a base coat and letting it dry. Select a contrasting color for the base of your nails, such as white or neutral beige. Using a fine-tipped brush or a nail art pen, create animal print patterns, such as leopard spots or zebra stripes, over the base color. Experiment with different colors and designs to achieve your desired animal print look. Finish with a top coat for a fierce and stylish design.
Advanced Nail Art Techniques
3D nail art
3D nail art takes your nail designs to the next level by adding dimension and texture. It can include small charms, rhinestones, or even tiny sculpted designs made from acrylic or gel. To create 3D nail art, you will need a UV or LED lamp, gel or acrylic products, a nail art brush, and various embellishments. Start by applying a base coat, then shape and build the desired 3D design using the gel or acrylic. Once the design is complete, cure it under the lamp and seal it with a top coat for durability.
Decals and stickers
Decals and stickers offer a quick and convenient way to create intricate designs on your nails. They come in various shapes, patterns, and themes and can be easily applied to your nails. Start by applying a base coat and letting it dry. Choose your desired decal or sticker and carefully peel it off its backing. Place it on your nail, pressing gently to ensure it adheres well. Finish with a top coat to seal the design and prevent it from peeling.
Acrylic painting
Acrylic painting is a versatile technique that allows you to create detailed and intricate designs on your nails. You will need acrylic paints, a fine-tipped brush, water, and a palette for mixing colors. Begin by applying a base coat and allowing it to dry. Dip your brush into the desired acrylic paint and start painting your chosen design onto your nails. Take your time and layer the colors to create depth and dimension. Seal the design with a top coat to protect it.
Embedding objects
Embedding objects in your nail art adds a unique and eye-catching element to your designs. You can embed small beads, glitter, rhinestones, or even dried flowers into your nails. Begin by applying a base coat and allowing it to dry. Apply a layer of clear gel or acrylic to your nail, then carefully place your chosen objects onto the wet gel or acrylic, arranging them as desired. Cure the gel or acrylic under a UV or LED lamp and finish with a top coat to secure and protect the embedded objects.
Nail Art Tips and Tricks
Preventing smudging
To prevent smudging, ensure each layer of nail polish or design is completely dry before applying the next. Consider using quick-drying top coats or a nail polish dryer to speed up the drying process. Avoid rushing or touching your nails too soon after applying nail polish or designs to give them enough time to set and dry properly.
Using proper lighting
Proper lighting is essential when creating nail art to ensure accuracy and precision. Natural daylight or a well-lit room will help you see the true colors of your nail polish and designs. If needed, invest in a small desk lamp with an adjustable neck or a lighted magnifying glass to provide optimal lighting for your nail art.
Creating symmetrical designs
Creating symmetrical designs can be challenging, especially if you are using freehand techniques. To ensure symmetrical designs, start by painting a guideline or outline on your nails, using a light-colored nail polish or a thin brush dipped in water-soluble white paint. This guideline will help you create symmetrical shapes and patterns, as you can easily wipe it off or paint over it once your design is complete.
Cleaning up mistakes
Mistakes happen, but they can easily be fixed when it comes to nail art. If you make a mistake, immediately dip a cotton swab or a small brush into nail polish remover and gently clean up the area around the mistake. For more significant mistakes, you can use a fine-tipped brush dipped in nail polish remover to correct the error. Take your time and be patient, as cleaning up mistakes can help you achieve a more professional-looking design.
Sealing the design
After completing your nail art design, it is crucial to seal it with a top coat. The top coat not only adds shine and durability but also helps protect the design from chipping and fading. Apply a generous layer of top coat over each nail, making sure to cover the entire design. Allow the top coat to dry completely before engaging in any activities that may damage the design.
Maintaining Your Nail Art
Protecting your nail art
To protect your nail art and ensure its longevity, it is essential to take certain precautions. Avoid using your nails as tools to prevent the design from chipping or peeling. When performing household chores or engaging in activities that may damage your nails, such as gardening or cleaning, wear gloves to protect the design. Regularly moisturize your nails and cuticles to keep them healthy and prevent the design from drying out.
Proper removal techniques
When it’s time to remove your nail art, it is important to do it properly to avoid damaging your nails. Start by soaking a cotton ball or a cotton pad in nail polish remover and place it on each nail, covering it with aluminum foil to hold it in place. Let it sit for a few minutes to allow the nail polish or design to dissolve. Gently rub the cotton ball or pad against your nail, removing the polish or design. If needed, use a wooden stick or a cuticle pusher wrapped in cotton to gently push off any remaining residue.
Preventing chips and fading
To prevent chips and fading, it is crucial to take steps to protect your nail art. Avoid exposing your nails to harsh chemicals, such as household cleaning products, as they can cause the nail polish or design to deteriorate. Apply a fresh layer of top coat every few days to seal and protect the design. Additionally, avoid excessive moisture, such as prolonged exposure to water, as it can cause the design to soften or peel.
Inspiration and Ideas
Online nail art communities and blogs
Online nail art communities and blogs are excellent sources of inspiration and ideas. They showcase a wide range of nail art designs created by talented individuals worldwide. Joining these communities or following reputable nail art blogs allows you to stay updated with the latest trends, learn new techniques, and discover unique designs that you can recreate on your own nails.
Using social media for inspiration
Social media platforms, such as Instagram and Pinterest, are treasure troves of nail art inspiration. Follow nail art influencers and hashtags related to nail art to explore a myriad of designs and ideas. Save your favorite designs for future reference and use them as inspiration when creating your own nail art. Don’t forget to engage with the nail art community by sharing your own designs and techniques.
Keeping up with nail art trends
To stay current with nail art trends, keep an eye on fashion magazines, beauty websites, and fashion shows. These sources often feature the latest nail art designs and colors that are in vogue. Experiment with trendy nail art techniques, patterns, and colors to elevate your style and make a statement.
Nail Art for Special Occasions
Choosing appropriate designs for weddings
When it comes to weddings, nail art can add an elegant and personal touch to your overall look. Consider the theme and color scheme of the wedding when choosing your nail art design. Classic French tips, delicate lace patterns, or floral designs are popular choices for bridal nails. Opt for neutral or pastel colors that complement your wedding attire and blend seamlessly with the overall aesthetic.
Nail art for holidays
Holidays offer the perfect opportunity to showcase festive nail art designs. Incorporate traditional holiday colors and symbols into your nail art. For Christmas, consider intricate snowflakes, candy cane stripes, or Santa Claus designs. Halloween calls for spooky patterns like bats, ghosts, and cobwebs. Embrace your creativity and have fun exploring holiday-themed nail art that reflects the joy and spirit of the occasion.
Nail art for themed parties
Themed parties allow you to go all out with your nail art. Match your nails to the theme of the party for a cohesive and eye-catching look. If it’s a tropical-themed party, consider vibrant colors, palm tree designs, or fruity patterns. For a masquerade party, intricate lace patterns, masks, or jewel accents can elevate your ensemble. Let your imagination run wild and embrace the opportunity to stand out with your themed nail art.
Nail Art for Short Nails
Creating illusions of longer nails
Even with shorter nails, you can create the illusion of length by utilizing specific nail art techniques. A popular technique is French manicure, where the tip of the nail is painted in a lighter shade, making the nails appear longer. Vertical stripes or gradient designs that elongate the nails can also create the illusion of length. Additionally, avoid excessive nail art or bulky embellishments that can visually shorten your nails.
Simpler designs for shorter nails
If you prefer a minimalist or low-maintenance approach, simpler nail art designs can be equally beautiful on shorter nails. Opt for single-color manicures or add a subtle accent nail with a different shade or a delicate pattern. Negative space nail art, where a portion of the nail is left unpainted, can also be an elegant and understated option for shorter nails. Explore geometric patterns or simple dots to add a touch of creativity to your nails.
Troubleshooting Common Nail Art Issues
Bubbles in nail polish
Bubbles in nail polish can be frustrating, but there are ways to minimize them. To avoid bubbles, shake your nail polish bottle gently or roll it between your palms instead of vigorously shaking it. Always apply thin, even layers of nail polish and avoid applying too much pressure on the brush. Allow each layer to dry completely before applying the next to reduce the risk of bubbles forming.
Steak lines
Steak lines, also known as visible brushstrokes, can detract from the overall appearance of your nail art. To minimize steak lines, choose high-quality nail polish with a smooth formula. Always apply thin, even layers of polish and use long, slow brush strokes to apply the polish. Avoid going over the same area multiple times, as this can create streaks. Using a high-quality top coat can also help minimize brushstrokes.
Design smudges
Smudging your nail art design can be disheartening, but there are a few techniques to prevent smudges. After completing each layer or design element, allow it to dry completely before moving on to the next. Using quick-drying top coats or a nail polish dryer can speed up the drying process. If needed, you can also lightly spritz your nails with a quick-drying spray to set the design and minimize the risk of smudging.
Design not sticking properly
If your nail art design is not sticking properly, it may be due to an incompatible combination of nail polish and design technique. Ensure your nail polish is completely dry before applying any other elements or designs. You can also try using a sticky base coat specifically designed for nail art to increase adhesion. Additionally, follow the instructions for the particular nail art technique you are using to ensure proper application and adherence.